Building this website with Jekyll: part 2
What is Jekyll?

In my previous post, I gave an overview of the basic files types used in building a modern website, and identified those that were relevant for building a website with Jekyll. To recap: with Jekyll, we write our content using Markdown which is processed to produce the HTML and we write our styling using SASS which is processed into CSS. We can choose to either write our client-side scripts as JavaScript, or use CoffeeScript which will be processed to produce JavaScript.
In this post, I want to explain what Jekyll is, and how you can use Jekyll to produce a website. I plan to then discuss some particular features of this website in future posts.
So, what is Jekyll? Jekyll is a system for creating static sites. This means that there are no server-side scripts which get run when someone tries to view your webpage. Furthermore, Jekyll uses a templating system known as liquid to make it easy to create pages for your website. Jekyll is therefore ideal for relatively simple websites which have a focus on content. Since my website was designed to give me space to host content related to my teaching, a blog to use to write about things I’m interested in or working on, as well as links to academic output, a static site was easily sufficient for my needs. With it’s support for liquid templating and many themes available to use immediately, Jekyll seemed like a great choice for what I wanted. It’s worth mentioning that there are many other static site generators which one could use instead of Jekyll, but since Jekyll was the static site generator that I’d already heard of, I went with Jekyll.
Building a website with Jekyll
Jekyll is a Ruby program which we use to turn a directory of content into a website which can be uploaded to a webserver. Jekyll is used from a command prompt, so I’ll assume familiarity with working at a command line (terminal) – here’s a good guide if you’re not already familiar with the terminal.
Once you have installed Jekyll onto your computer (if you have any problems with this, there is a jekyll troubleshooting page), you can create your first Jekyll site by opening up the terminal, cding to the directory you want to put the site in, and running the command jekyll new mysite (this names the site folder ‘mysite’ but has no effect on the site itself).
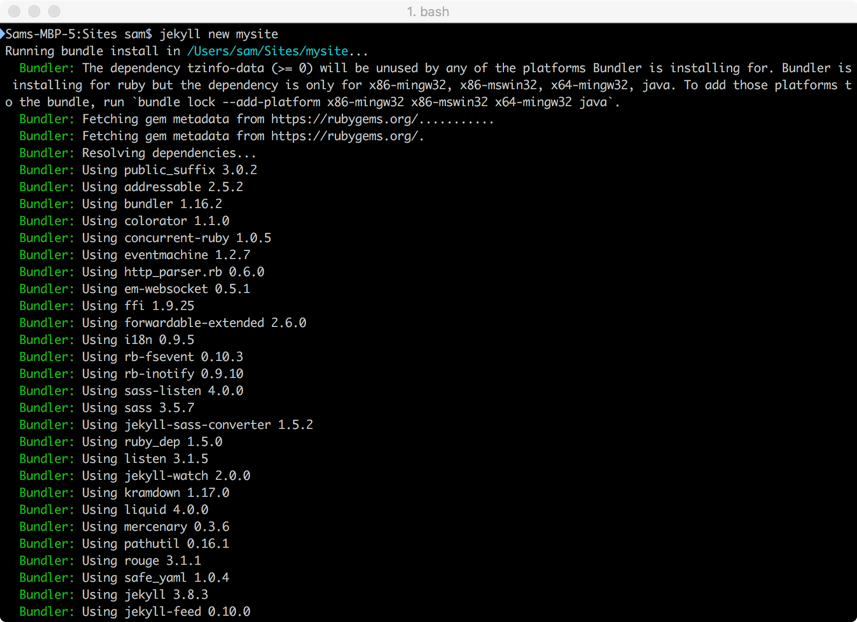
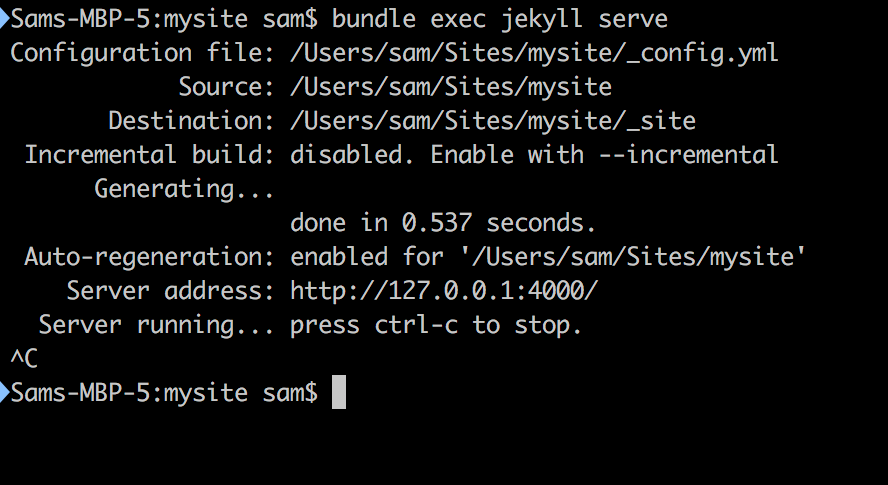
This scaffolds out a basic site using the default theme ‘minima’, which we can change later. To have a look at your new site, we can use Jekyll’s built in local webserver. Change into the directory by running cd mysite and then run bundle exec jekyll serve. This command uses the [ruby gem] ‘bundler’ to make sure that any gem used in your Jekyll site is up-to-date and then runs the local server. By default this site will now be available at http://127.0.0.1:4000/ as indicated by the ‘server address:’ part of the output of the previous command.
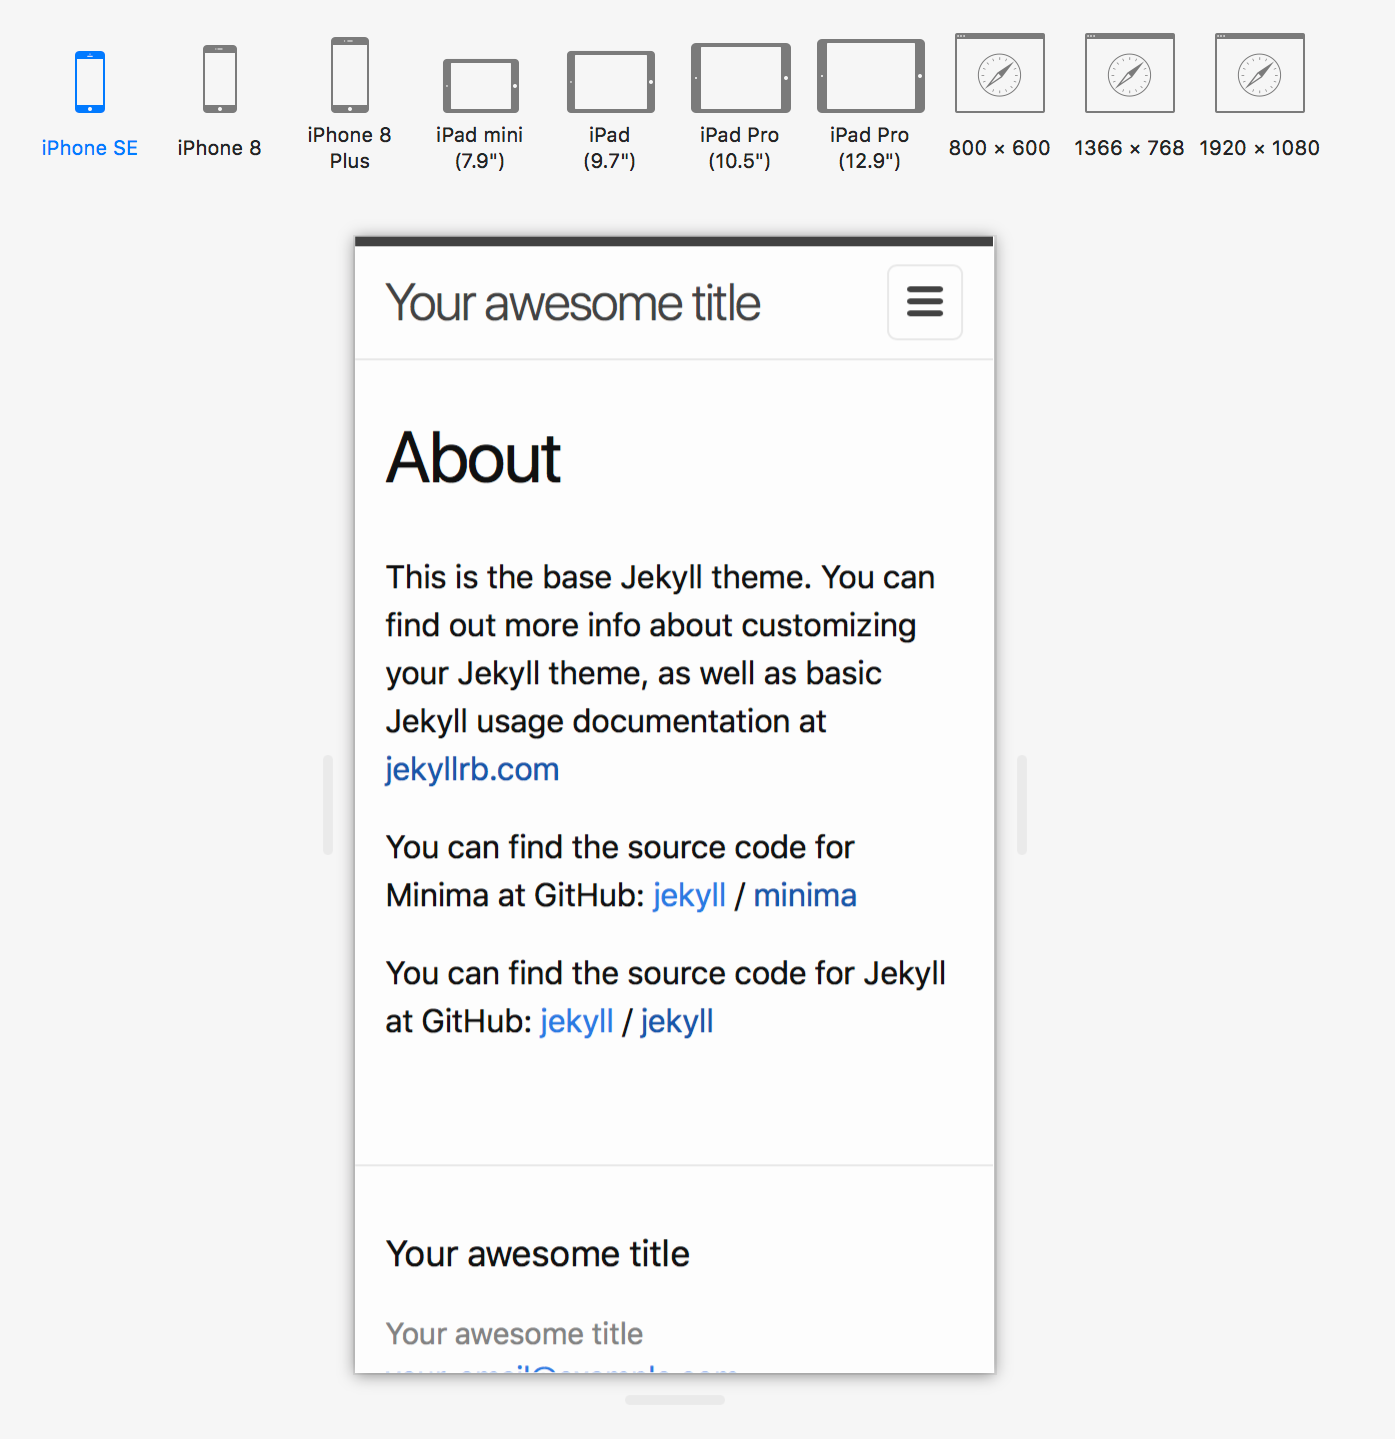
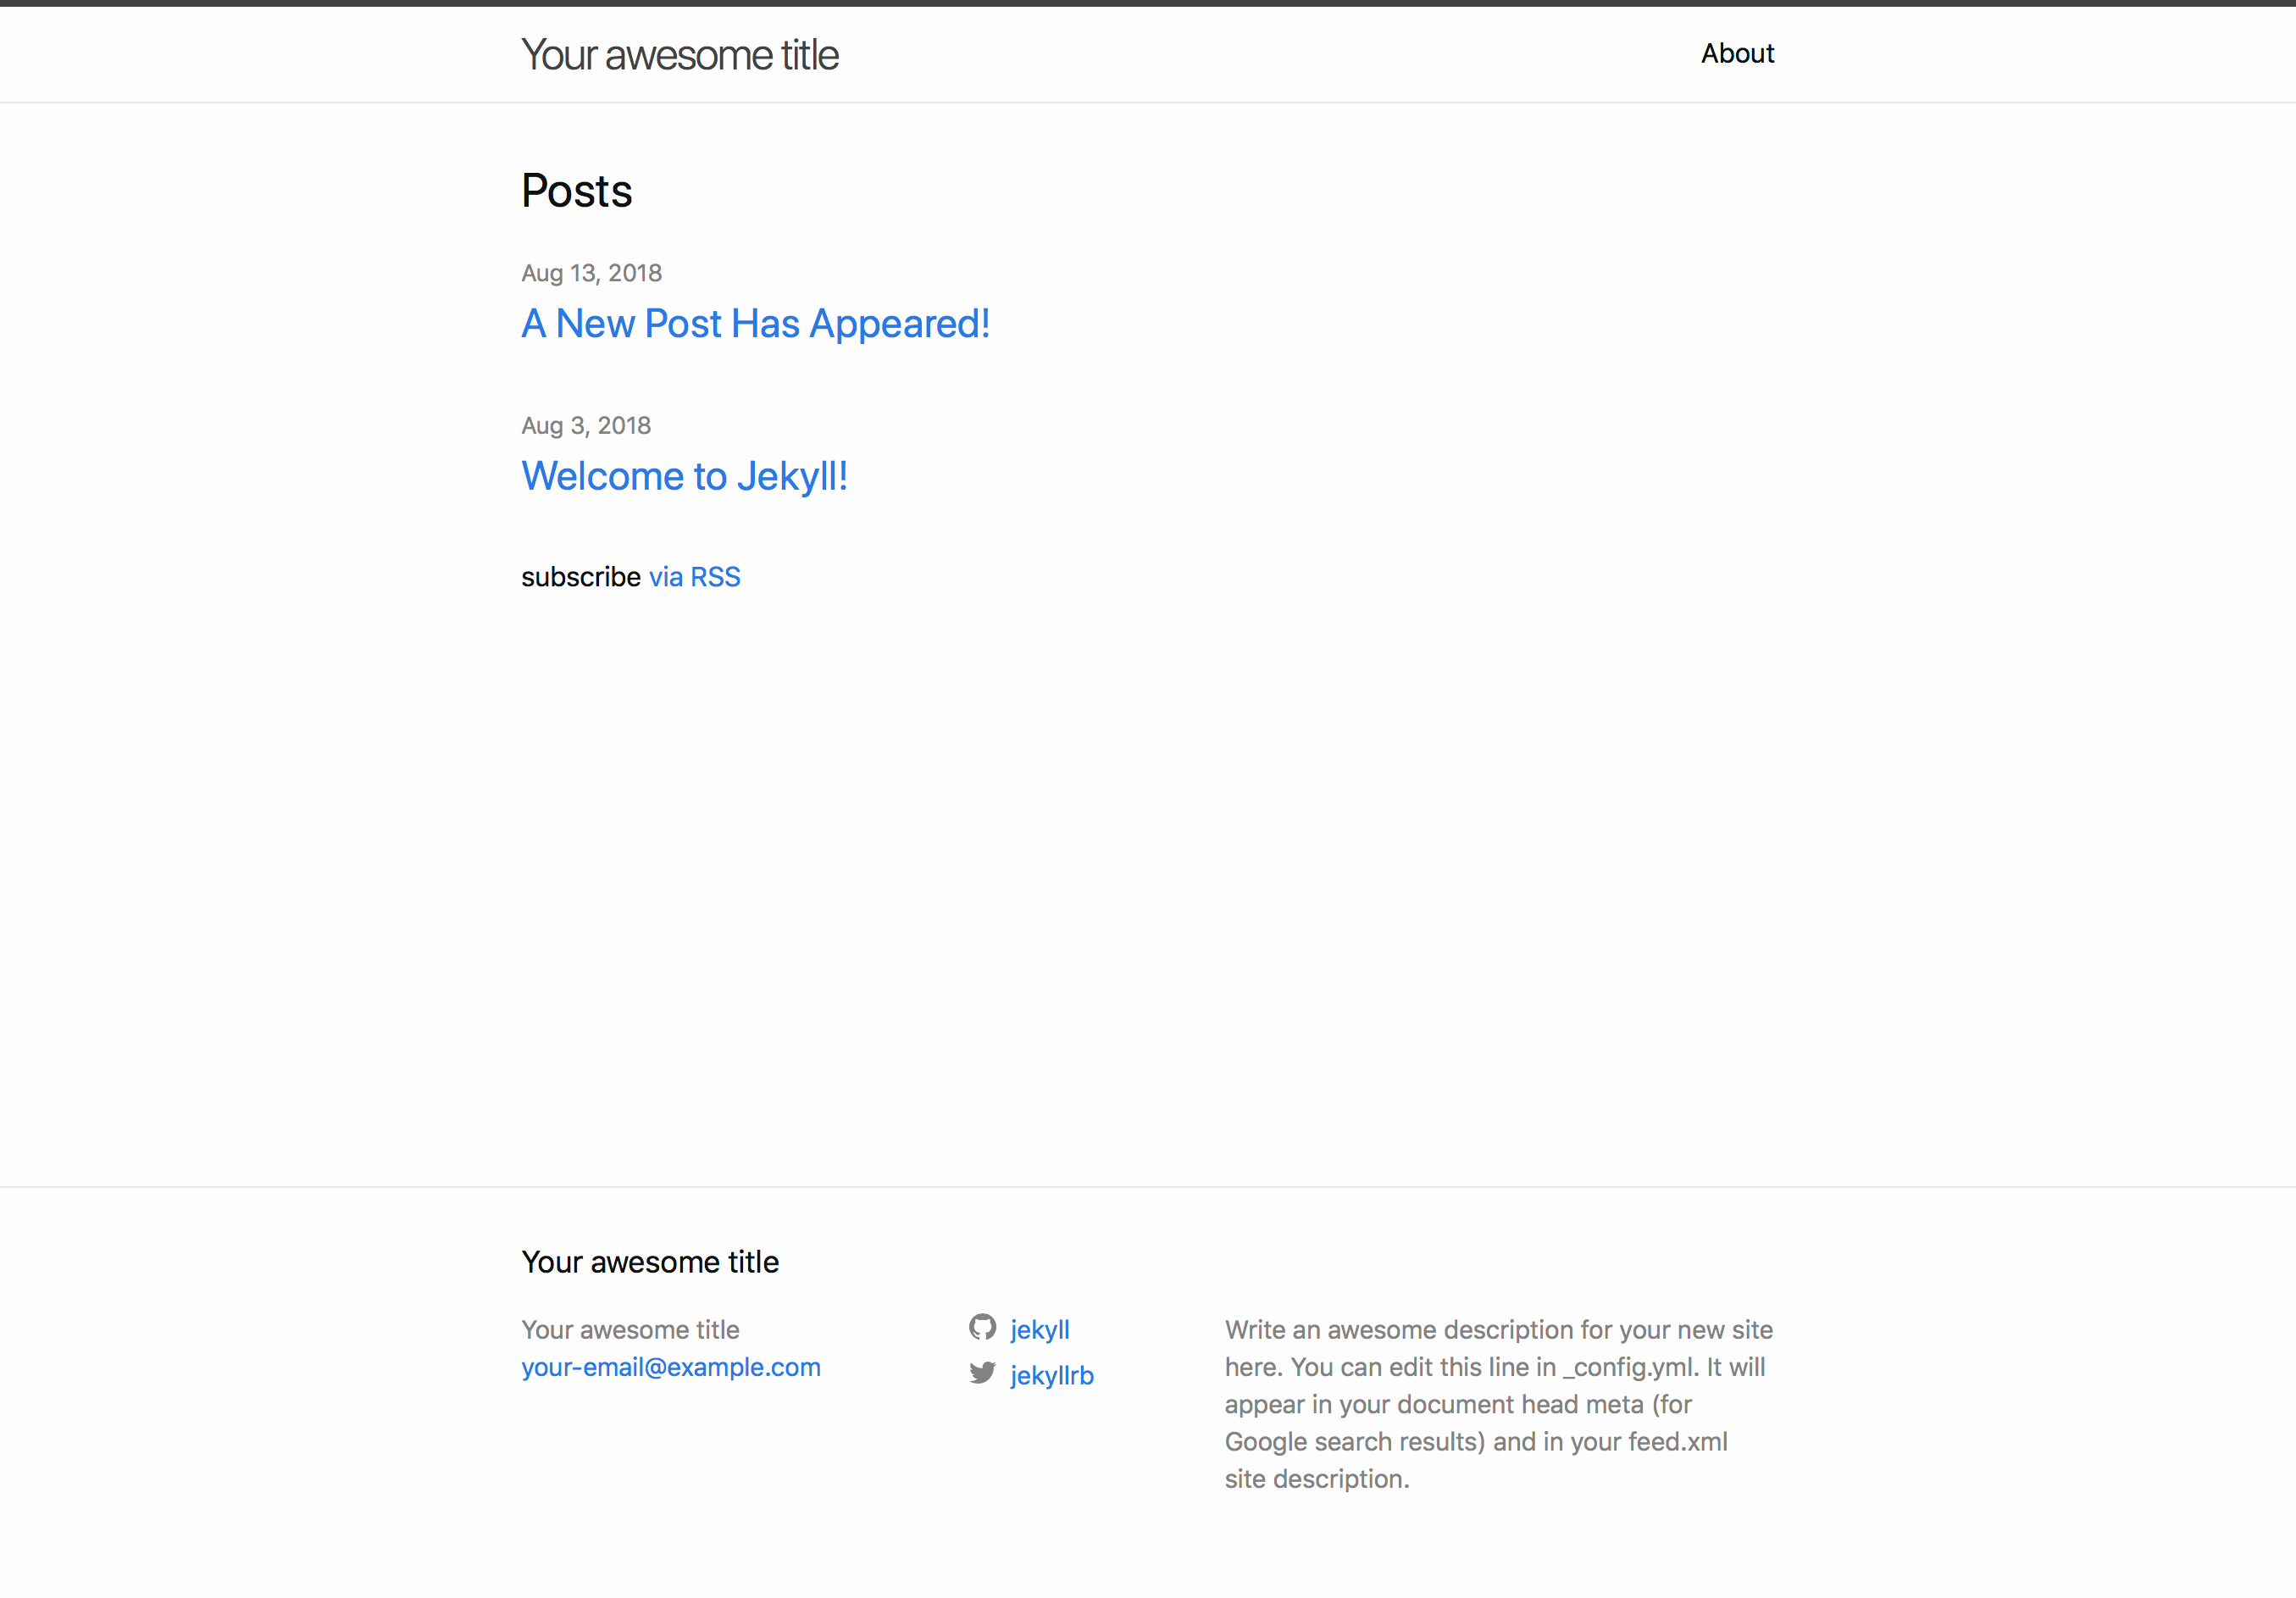
If you now open a web browser and type the server address (http://127.0.0.1:4000/, unless you’ve changed it from the default) into the address bar at the top, you will see the default homepage of your new Jekyll based website. By using the power of Jekyll themes, not only does the website already look good, it’s also got a responsive mobile-friendly design.
When we run bundle exec jekyll serve, as well as starting a local webserver to let us test the site, Jekyll has also built the site for us. We’ll look at where the files for the built so go in the next section, but basically this means that Jekyll has processed all the files that describe our site, and produced the html and css which we can put onto a server. If we want to build the site without running the test server, we can do that using bundle exec jekyll build.
Directory Structure
If you look at the contents of your Jekyll directory, you should see that running jekyll new mysite, followed by bundle exec jekyll serve, has created 6 regular files and 2 folders for us.

We have 2 basic pages called ‘About’ and ‘Index’, both of which are stored as Markdown files, as well as a third page, 404.html, which is loaded when the server can’t find a page we ask it for. The index page is the one which is loaded when you just type the url of the website (which is the local server address for the time being) without asking for a specific page. We’ll discuss the structure of these pages in the next section, for now let’s just consider the overall directory structure.
The next file I want to discuss in our new site folder is the _config.yml file. Note that this file, as well as some of the folders in this directory have names starting with an underscore character. This is a naming convention Jekyll uses for files and folders which are processed when building the site, but which don’t explicitly appear in the output files which are uploaded to our server. The _config.yml file is a configuration file written in a language called YAML (to rhyme with camel). I won’t go into the details of YAML here, as its designed to be very easy to read, and looking through the default config file should make everything clear. The values which we set in this configuration file can be easily accessed through liquid.
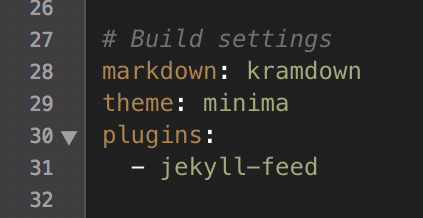
As well as allowing us to set some site wide constants which we can access through liquid, the _config.yml file also sets options which are interpreted by Jekyll when we build the site. For instance, the default build settings tell Jekyll to use the kramdown markdown processor and the theme called minima.

The final files included in our new site are Gemfile and Gemfile.lock. As the name suggests, these files concern Ruby ‘gems’, which are Ruby packages – libraries or programs. Jekyll uses a gem called bundler to manage the other gems that you might want to use in your website. For example, this website uses the jemoji gem to enable me to easily include emoji in my posts – like this ![]() . The default Gemfile in your new site folder ensures that the gem associated with the default minima theme is installed and up-to-date, amongst other things. When we build the site by running
. The default Gemfile in your new site folder ensures that the gem associated with the default minima theme is installed and up-to-date, amongst other things. When we build the site by running bundle exec jekyll serve, this tells bundler to check the Gemfile to ensure that all required gems are installed and up-to-date (and that all gems which our required gems are dependent on are also installed) before running the jekyll serve command. The Gemfile.lock contains a list of all the gems that bundler has installed for your site.
One main usage of Jekyll is to run a simple blog (though Jekyll is still useful for static sites without a blog), and these blog posts live in the _posts folder. Each post should be a markdown file, with a name of the form YYYY-MM-DD-title, and will then automatically be included by Jekyll in the blog posts for the site. We’ll look at the content of these files in the next section.
The final folder you will see in your new site folder is the _site folder. If you were paying careful attention to the contents of this folder, you’ll have realised that this folder was only created once we first built the site by running bundle exec jekyll serve. This command told Jekyll to look at all the content making up our website and from this to produce the actual html, css and javascript files which we should upload to our server. These files are then placed in the _site folder, and so it is the entire contents of this folder which we should upload to our server. Any files or folders not otherwise processed by Jekyll will be copied verbatim into the _site folder. If we therefore create an assets folder in the root of our site folder, we can place any images or other files which Jekyll doesn’t need to process in this folder, and they will appear in our final _site folder ready to be uploaded.
Although these are the only files and folders present in a new Jekyll site created with jekyll new mysite, there are some other special folders used by Jekyll themes that we’ll discuss later.
A Jekyll page (with a YAML header)
If you open the markdown file associated with the about page, about.md, you’ll see that it only contains the content of the page. The theme styling, as well as the header and footer of the page, are included by Jekyll using the liquid templating system, which we discuss in more detail below. The important thing to notice about the contents of a jekyll page (or a jekyll post, check out the default post found in _posts/) is that it starts with a YAML header. We create a YAML header by starting with three hyphens and closing with three hyphens, everything between is written in YAML. For the about.md page, the YAML header sets a page title, the link at which the page can be found (called a ‘permalink’), and which layout the page should be based on, which in this case is the page layout.
Anything after the YAML header is defined as the ‘contents’ of the page or post and in this case is written in markdown. Using the default kramdown markdown processor (as set in the _config.yml, see above), we can easily create posts containing headings, body text, lists, images, code blocks etc. In a future post, I’ll also explain how to include \(\LaTeX{}\) in the markdown of a post and have it processed into the html. We can also include raw html in our markdown content, which will simply be left alone by the markdown processor and hence appear exactly as typed in the output html. This is a convenient way to add any content to a markdown document that isn’t naturally supported in markdown (an iframe for example). We can also apply html attributes, such as class and id to both inline and block level elements, helping to achieve the desired style without resorting to pure html.
The way that Jekyll works is that every document in the site folder which starts with a YAML header is processed by Jekyll. Any file which doesn’t have a YAML header is ignored and just copied into the site folder in the same relative location as in the main site folder. If a file is intended to be processed by Jekyll, it must therefore begin with a YAML header – this can be an empty header created by starting with 2 lines containing nothing but three hyphens per line.
New pages can be added to your site by simply creating a new file in the root of the site folder and starting the file with a YAML header. If a newpage.md is created in the root of the site folder, it will be available at your_server_address/newpage.html without requiring a permalink property to be defined in the YAML header. New pages can also be placed in folders
As described above, blog posts should be placed in the _posts folder and given a name of the form YYYY-MM-DD-title. These are then process by Jekyll to form the blog posts, with a layout template, title, description and date defined by the YAML header. If you add a new file in the _posts folder in this way, you will see it gets automatically added to the site posts.
Liquid
Liquid is a html templating language. This means that it provides a way to programmatically build html pages using variables, loops and simple functions. The first way that we’ve already seen liquid being used is through the ‘layout’ defined in the header of each page. If you looked at the markdown for the about.md page and the 'date'-welcome-to-jekyll.markdown post that were created when we built the site, you’ll have seen that they used the page and post layouts respectively. These layouts were define by the minima theme and we’ll talk about where exactly these layouts are defined shortly. To start with, let’s look at the contents of the page layout:
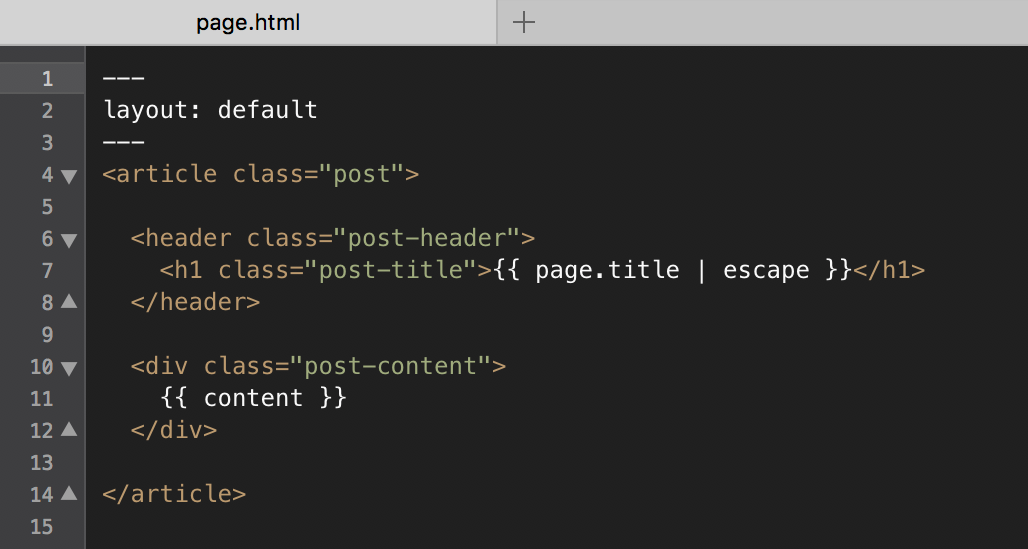
The main part of this layout is simply html defining a structure of divs, which will then be styled with accompanying sass. Inside the div with class post-content, we see the liquid markup of double curly braces, {{ content }}. These double curly braces are processed by jekyll (using liquid) when we build the site, and are replaced by the liquid content variable. This is the variable that the entire contents of a page (or post) after the YAML header are loaded into. In this case, our about.md page uses this page layout, and so the contents of the about.md file, after the YAML header, will all be placed inside the post-content div in the output html. If you know how to use the web inspector of your browser, you should go check this using the site preview (bundle exec jekyll serve).
This page layout also uses the liquid tag page.title (which is actually added to liquid by jekyll), and as you might have guessed, refers to the title (as defined in the YAML header) of the page which calls this page template. The pipe symbol | is then used to pass this variable to the liquid function escape, which is built to handle certain special characters.
The final thing to notice about this page layout, is that it itself starts with a YAML header defining a layout, default:
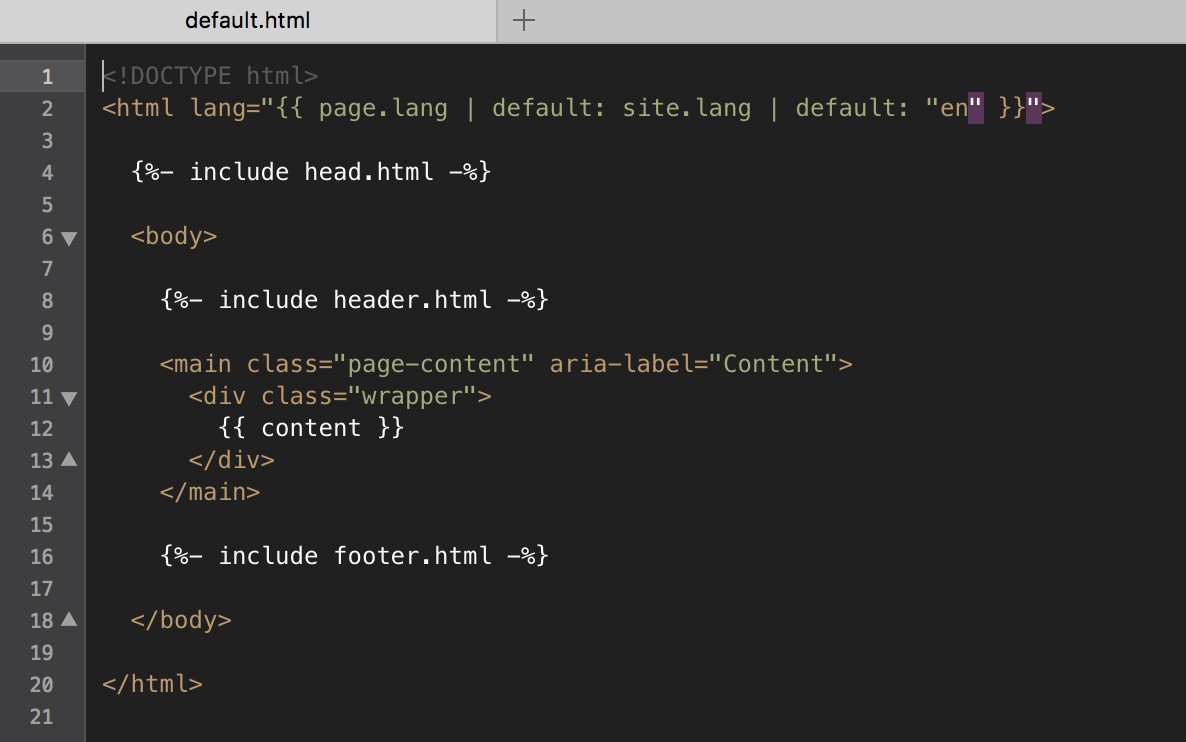
This means that the contents of the about.md page are first wrapped in the layout defined by the page layout (by replacing the {{ content }} of the page layout) and then this entire block of html is placed into the {{ content }} tag of the default template.
The default template also shows us another feature of liquid, the {% include X %} tag, where X is some html file. I’m not going to discuss the notational distinction between {{ X }} and {% X %} here, but if you’re interested you can read more about that here. Regardless, the include tag simply inserts the given html content at the place of the insert (I’ll show where these files can actually be found below). In this example, the contents of the head.html, header.html and footer.html files are inserted into the corresponding points of the layout.
We can place liquid tags in the main content area of any page or post we like, and these tags will be evaluated when the site is built. For example, I mentioned that the {% include X %} tag in the default layout copies the contents of the corresponding html files into the page being constructed using default. These files themselves contain liquid tags which are processed as they are included. We can also create our own liquid tags, a feature I plan to discuss in a future post.
Themes
Thus far, our site has been constructed using the minima theme, but one feature of jekyll is that there are many themes which we can easily use in our projects. Jekyll themes contain the sass defining the style of the theme, as well as the layouts available to the theme, the includes which the theme uses and any assets which the theme requires (such as images or javascript files).
Installing a new gem-based theme
The easiest way to install a new jekyll theme is as a ruby gem – you can find many such jekyll themes on rubygems.org by searching for jekyll-themes. Once you’ve found a gem-based theme which you like, installing the new theme is simple:
- First, edit the
Gemfileto replacegem "minima", "~> 2.0"withgem the_new_theme. - Run
bundle installto ensure all gems in your Gemfile are installed. - Modify
_config.ymlfromtheme: Minimatotheme: the_new_theme. - Build your site with the new theme by running
bundle exec jekyll serve.
Overriding theme defaults
So we’ve now seen how to install gem-based themes, what if we want to modify the theme slightly? Essentially, a gem-based theme just packages up the style files of a jekyll site and stores them elsewhere. We can see where the minima theme files are stored by running bundle show minima. If you are using the bash shell, you can change immediately to this directory using cd $(bundle show minima). Alongside a readme and a licence, this theme directory contains four folders:
- The
_includesfolder stores all the html files that can be included using the liquid{% include X %}tag. - The
_layoutsfolder stores all the layouts that pages and posts in our site can use by defining theirlayoutin their YAML headers. - The
assetsfolder contains any assets that our theme needs to use, such as images or scripts. An important point to note is that there is amain.scssfile in the assets folder. This file is the only sass file with a YAML header, and is the one which is actually processed into a css file by jekyll. This header can be empty, or contain a single comment, but it must be present in order for the sass to be processed to css. This file should somehow include all the other styles we define, usually by using the@importcommand. In the output files produced when we build the site, we will get amain.cssfile which is the stylesheet our pages should load. - The
_sassfolder contains sass files. Using the sass@importstatement, we can break our style into different parts each with a specific function, and then have one master file which@imports the others. By default, the@importis taken relative to the_sassdirectory, so@import X.scsslooks for a file calledX.scssin the_sassfolder. In the case of the minima theme, there is aminima.scssfile in_sasswhich imports all the other style files, and is then itself@imported by themain.scssfile in assets as described above.
If we want to override the theme defaults, we can copy the relevant files and folders into our local mysite directory and edit these copies. The local files in the site folder will taken to have precedence over ones in the theme directory if they exist. This means that if we have two sites, both built on say the minima theme, we can make different local adjustments to them, without changing the master theme files.
Non-gem-based themes
Some themes which you might find online, for example at these sites, might not have been built as gem-based themes. Installing these is usually a case of copying the theme files directly into your site folder. If you look at the source for my site, you will see that this is the case for this site, with all the includes, layouts and sass files stored directly in the main site folder.
Conclusion
This post turned out to be a lot longer than I had originally hoped. The take away points should be that creating new content for a jekyll site is simply a matter of creating a new markdown file with a YAML header defining important properties like the title and the layout to apply. The site can then be previewed using bundle exec jekyll serve and the output files which are produced in the _site directory consist of html, css and javascript, and can be placed directly onto a webserver and served statically. Pages and posts can leverage liquid as well as ‘standard’ markdown which makes creating content simple. If you want to make adjustments to a theme, you need to find the relevant files as explained here and edit them; they typically consist of html and liquid. This should now bw all the information you need to explore [how this site works][mathsdeptsource], or to build your own Jekyll based site. In future posts in this series I’ll discuss some of the additional features I’ve implemented for this site, such as enabling \(\LaTeX{}\), AnchorJS and using custom liquid tags.